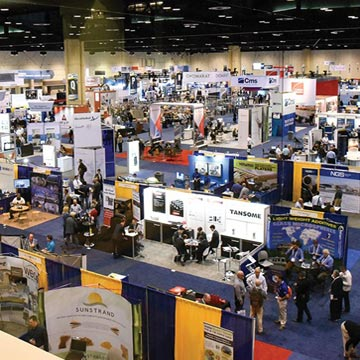
CM Magazine

Print Version


A Wise Investment? How to Set Up a Quality Lab for Under $4500

By Russ Fisher

Some composite molders that test raw materials before applying them to manufacturing processes. Many, however, do not. Is it important? Many material failures that occur after processing and in the field can be traced back to defective raw materials. What are some of the ways a composite molder can get started on a quality lab without spending a great deal of capital?

Is it Necessary?
The first question that needs to be answered is why a need for a quality test lab? The resin and fiber suppliers generally qualify materials before shipping them direct to the molder or distributor. This process cuts down on "off spec" materials. A couple of factors, however, can cause problems.
Resin systems are "alive" when in the can and may "drift" over a period of time. (Reference the series of articles "Controlling Gel Time Drift" in the recent October, November/December, and soon-to-come January issues of CM.) This time factor varies with the temperature of storage and time that the material shows up on the loading docks of a manufacturing facility. Testing batches of resin can help eliminate off spec product from being molded and the possibility of failures and/or waste later on. The simplest of tests can save time and money from the dumpster. Unlike thermoplastics, there is little or no reclaim value in a molded product that is not manufactured to specifications.

Viscosity and Thixotropic Index
Polyester systems can be checked with a few easy tests before looking at the overall laminate matrix. Checking viscosity and the thixotropic index are two quality measurements. Readings vary slightly from batch to batch and sometimes resin can fall out of spec after spending a short period of time in unfavorable conditions. One of the more popular viscometers is made by Brookfield Engineering Laboratories. It sets on a small tripod that supports a motor drive and a spindle that is conducive to measuring a small sample of liquid resin. The resistance of the spindle in the liquid is detected from a spring-type detector while the spindle is rotating at certain RPMs--the more the resistance the higher the viscosity.

The type or size of spindle is determined by the range of specified viscosity required during the test. For instance, one size spindle would be used for laminating resin and another for gel coats. The RPM setting gives you the viscosity to look for at that predetermined speed. Data sheets generally give you the speed and spindle type used. The resin manufacturer also can be consulted. At different speeds the viscosity reading changes because the resin is "non Newtonian." This then gives you the Thixotropic index. This index involves measuring the ability of the resin not to sag on vertical surfaces. Water for instance would have a thix index of one. A spray up resin may have an index from 1.5 to 2.5. This piece of equipment, a basic model. costs about $1700.00 if bought new.

Gel Time
After the resin has been tested for viscosity and thix index, the next step is gel time. There are many gel time testers on the market. The simplest is the low torque synchronous motor types that use a wire stirrer. The resin and initiator are placed in a paper cup. The stirrer is attached to the motor and spins at around 20 RPMs. When the resin starts to gel the wire and motor stop due to the resistance of the resin solidifying. A timer on top the motor shows the amount of time if took to gel. This method is accurate to plus or minus two percent. The base cost of this type of gel timer is $520.00. The wires are inexpensive as well as the paper cups. It requires little or no clean up. These types of gel time testers can be found in catalogs like Paul N. Gardner. The model they offer is a GT-S standard model gel timer.

Some basic pieces of equipment for getting started with gel-time and other tests are a scale and thermometer. A pocket type scale can be flexible and inexpensive. It is recommended that a 500 gram scale would be preferred. The scale is battery operated and portable. The cost of the scale is about $200 and can be purchased in many catalogs. The average weight for resin and laminate testing is about 200 grams. A thermometer is needed for temperature of the resin and initiator (catalyst). Since the ratio of resin to initiator is large, the pocket scale can zero out a tare weight for the addition of the initiator. Some thermometers have a maximum temperature setting allowing the measurement of peak exotherm. The cost of a thermometer ranges from $30 to $80. A stop watch is useful to time peak exotherm which is an important measurement for reaction rates of the resin system.

Hardness vs. Time
One test that is used for composite laminates is a Barcol meter. This measures the hardness of the neat resin (without fiber) and the laminate composite. The hardness gives an indication of the degree of cure. This is a time related test. ASTM D2583 is the test used for this measurement. The meter is a Barcol 934-1. The laminate is made using a two-to-three layer fiber layer in the resin matrix. The test gives the indication of several results of the laminate structure. One is the final hardness cure after 24 hours, another is the development of the resin cure in "time versus hardness." The time of first hardness pickup is a good indicator of the type of resin cure that will take place.

If the same resin is used for testing, a graph can be used for hardness versus time. This graph is generally unique to every resin and fiber laminate.

The prediction of cure will help in time management of the part in a mold for demolding. The fingerprinting of the laminate composite will show the variations of batch to batch of the resin used. Outside the lab this instrument can be used before pulling a part out of a tool for minimum strength requirements of the composite. The range of this testing equipment is from 0 to 100. This is converted to 25 to 150 on the Brinell scale using a 10 mm ball with a 500 kg load. The cost of this instrument is about $700.00.

Shrinkage
Another test that is handy to use is shrinkage. This is a test that under controlled conditions will show the linear shrinkage of the neat resin and/or the laminate composite. This piece of equipment can be made internally. A flat mold can be used with two scribe marks on it. The distance can be anywhere from 150 to 200 mm.

A laminate is made and cured. After curing, measure the distance between the two lines in the composite and compare them to the marks on the mold. An accurate scale needs to be used because the shrinkage will be small. This helps with determining the amount of shrinkage observed in the parts that are molded. Also, it can determine the differences from batch to batch of the specific resin system. The cost on this instrument is free if you make it yourself.

The weight scale also can measure the average weight of the fiber used in the laminate. Using a 500 gm scale, an average fiber weight of 450 gm/meter squared (1.5 oz per square foot) can be measured. Several samples need to be taken to get an overall average as the fiber weight is approximate and every fiber manufacturer has a different weight system requirement on the supplier company's data sheet.

Fiber Volume
The percentage of fiberglass in a laminate is important to a molder. This can be achieved by measuring the density of the composite laminate. In many cases the laminate is burned off to remove resin which leaves glass and filler. One way to avoid having to buy a lab oven is to measure the density of the laminate. A graduated cylinder and a pocket balance can be used for laminates of resin and fiber. The cylinder is not expensive and can be used to determine the glass-to-resin ratio. It is only important to know the density of the resin and glass. The weight of glass in the laminate is already known via testing conducted before the laminate is fabricated. The purpose is to solve the ratio of the glass to resin from determining the density of the final laminate. Take a small piece of the laminate and place it in the cylinder which is half filled with water. Measure the displacement of the laminate in cc. Weigh the laminate ahead of time and the density is known.

Viscosity, gel time, hardness and peak exotherm are important tools in the testing of composites. The set up for this simple system if everything is bought new is about $4,000. There are other means to save money on the start up of a test lab. One of the ways is to go to an auction for testing lab equipment. Another way is to call the equipment manufacturers to see if anybody has turned in used equipment for a trade in.

E-bay or other selling web sites can also by helpful. Used equipment may need to be tested and calibrated and standards may need to be bought. The savings could add up to thirty cents on the dollar, but it should be noted that some extra time and money may need to be invested.

If manufacturers invest the right time and research on lab setup money can be saved. Not every fabricator wants to test resin and fiber systems. They depend on the resin and fiber manufactures to give them accurate data. If you plan it right the cost to check incoming raw materials can be inexpensive and save money in lost time and scrapped parts. The question is not always the quality of the materials, but the environment that the materials have been stored at and the time prior to being applied. The cost for testing materials in a composite molding facility is surely cost effective compared to producing bad product. In the end it is a wise investment to consider.

Russ Fisher is president of Fisher Technologies and a CM contributing editor: 262.641.6370; frussel827@aol.com.